Steps to Enable Billing
Navigate to Clients Tab
From the sidebar, click on the Clients tab to access the list of client organizations.
Manage Organization
Locate the organization for which you want to activate billing. Click the Manage button next to the organization.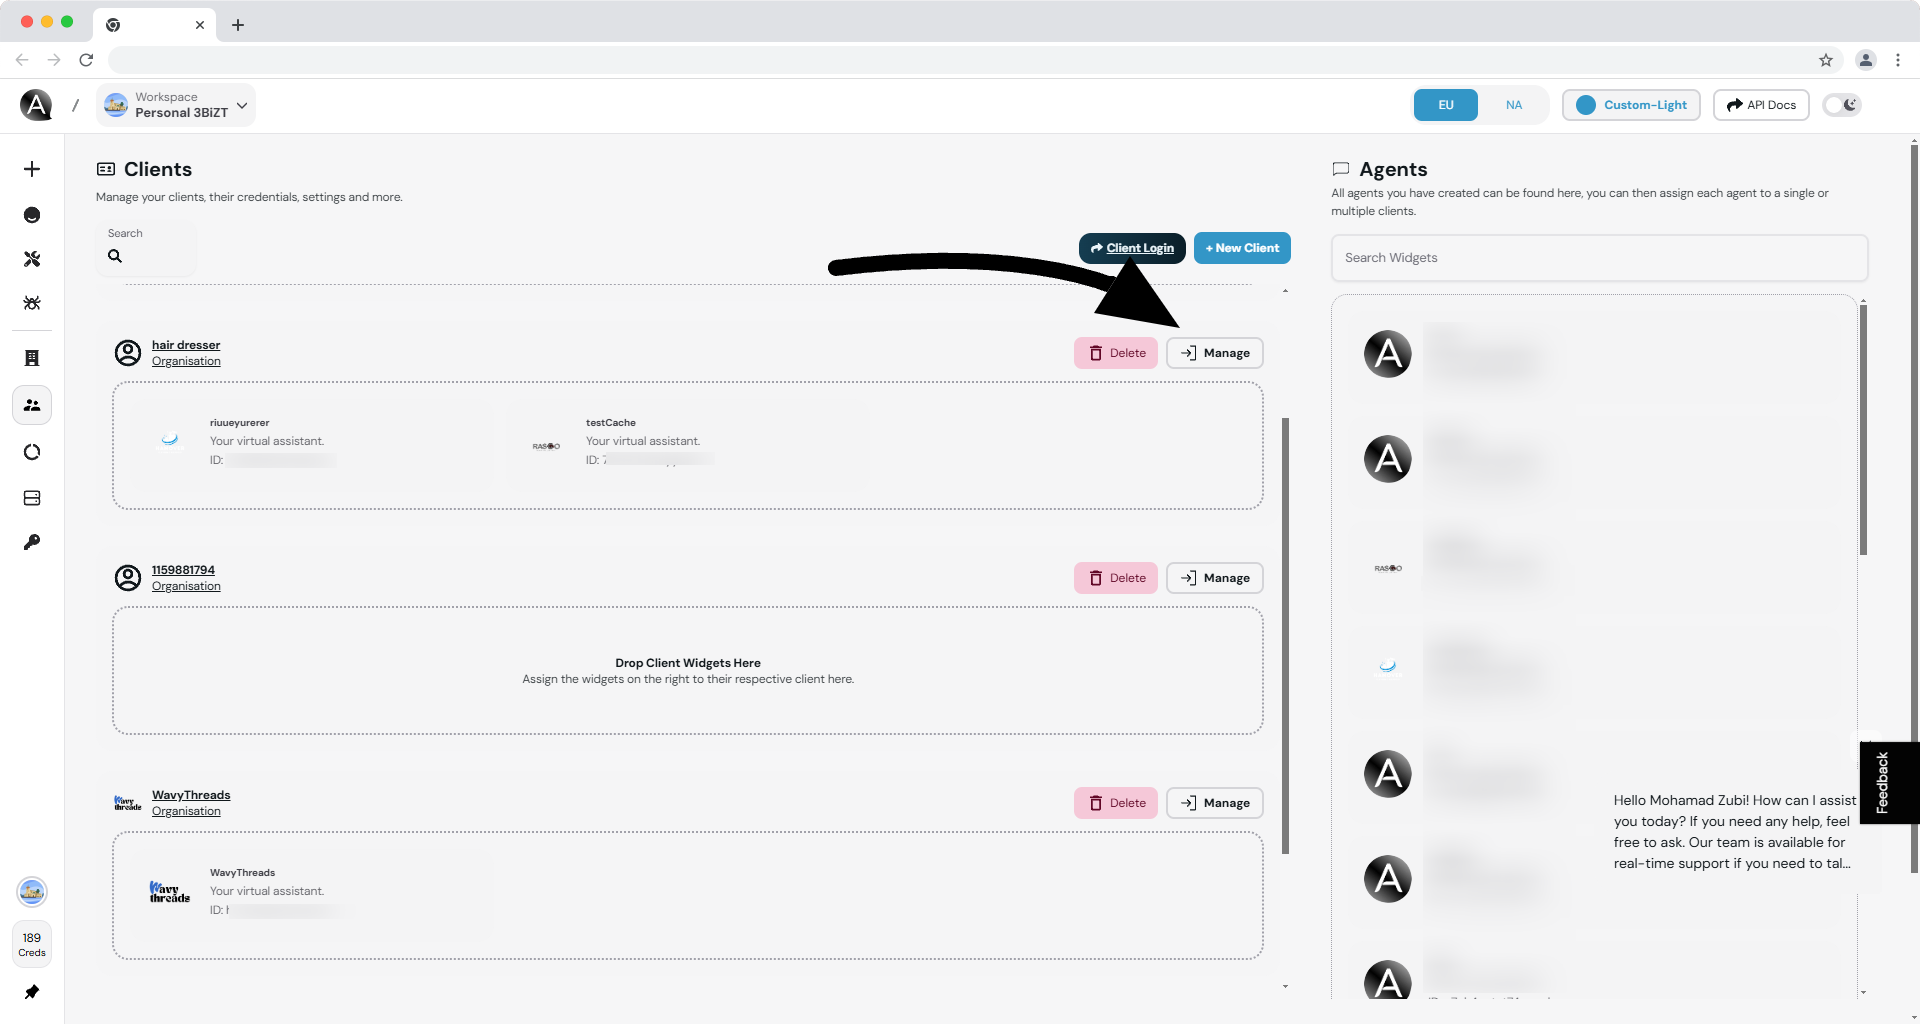
Key Notes
Activating billing allows organizations to handle financial transactions
securely and efficiently. Ensure that your Stripe account is connected to
enable full functionality.
What happens after enabling billing?
What happens after enabling billing?
The client will be able to view and manage their credit balance, payments, and other financial operations directly through your white labled dashboard.
Can I disable billing later?
Can I disable billing later?
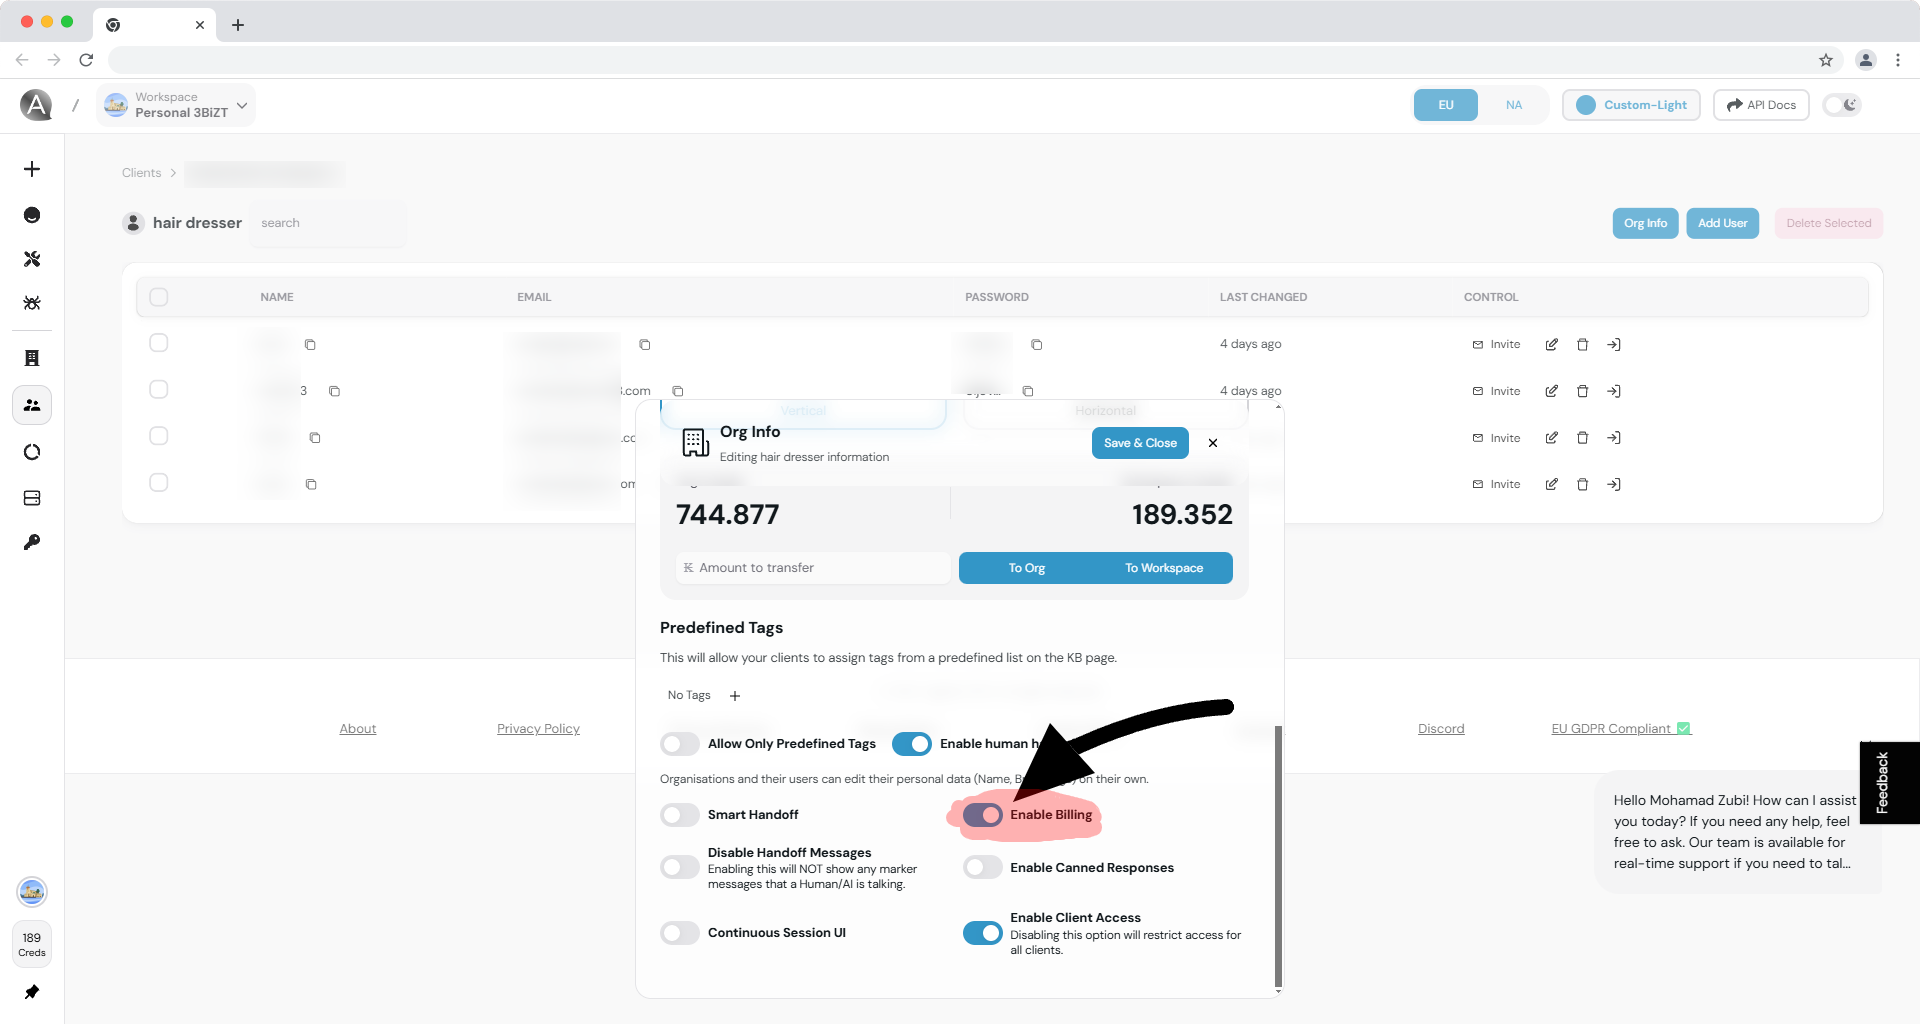
Yes, billing can be disabled at any time by toggling the Enable Billing option off in the Org Info settings.
Related Documentation
Stripe Integration Setup
Learn how to connect your Stripe account for billing functionality.
Client Management
Explore how to manage client organizations effectively.
Billing FAQs
Find answers to common questions about billing and credits.
API Reference
Discover how to use our API to customize billing features (coming soon).